We may earn money or products from the companies mentioned or linked to in this post, including Amazon Affiliate links.
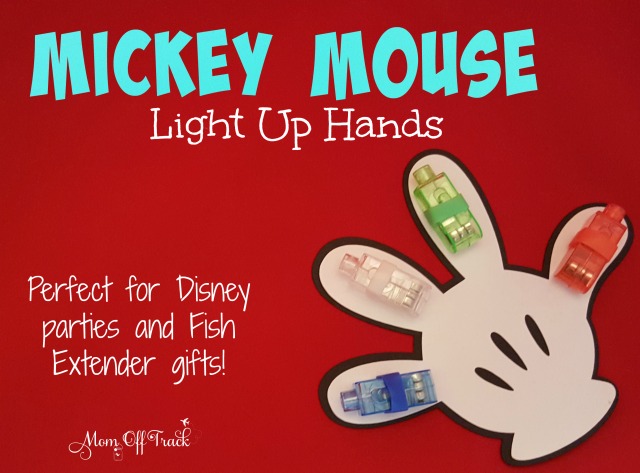
I am getting ready for an upcoming cruise on the Disney Fantasy. We are going to participate in a cool gift exchange program called Fish Extenders. The program is called a Fish Extender because each room on a Disney Cruise ship has a fish decoration outside the door. Someone decided it would make a great place to hang a bag and “secret Santa” type gift people. The idea caught on and Fish Extenders are now a Disney Cruise cult phenomena. People spend a lot of time, money and effort participating in the Fish Extender on their cruise and you can find adorable Fish Extender gift ideas all over Pinterest. I’ve been working hard on our entries into this fun game and I came up with these super cool Mickey Mouse hands with finger lights. This is how I made them.
Materials Needed:
The following list and directions contains affiliate links.
- Cricut Machine
- Mickey Mouse hand graphic to import into your Cricut Design Space app
- Tombow Liquid Glue
- Zots large glue dots
- Black 12*12 light cardstock (so you can cut out 4 at a time)
- White 12*12 light cardstock
- Finger lights (you need 4 per person)
Step 1:
Open up your Cricut Design Space app and create a two layered Mickey Mouse hand design using the black and white cardstock. The black should be the bottom layer. Set it to print 4 to a page and cut them out. Watch this quick video if you aren’t sure how to set up your design.
Step 2:
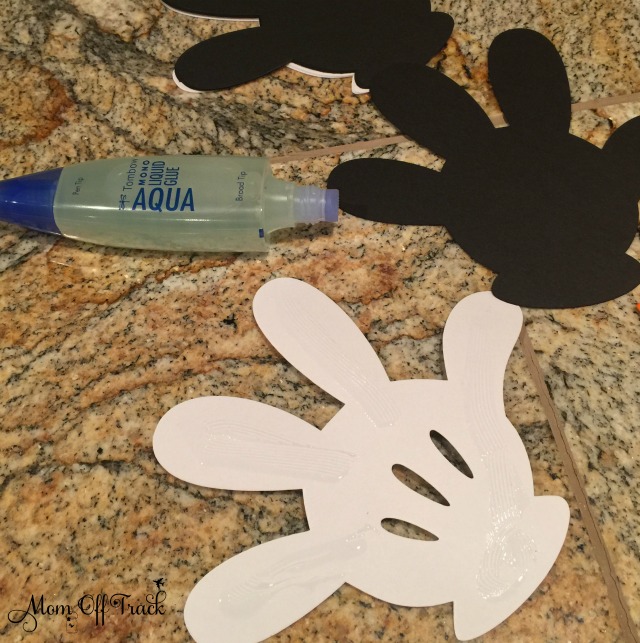
Using the broad side of the Tombow liquid glue adhere the black and white cut layers together.
Step 3:
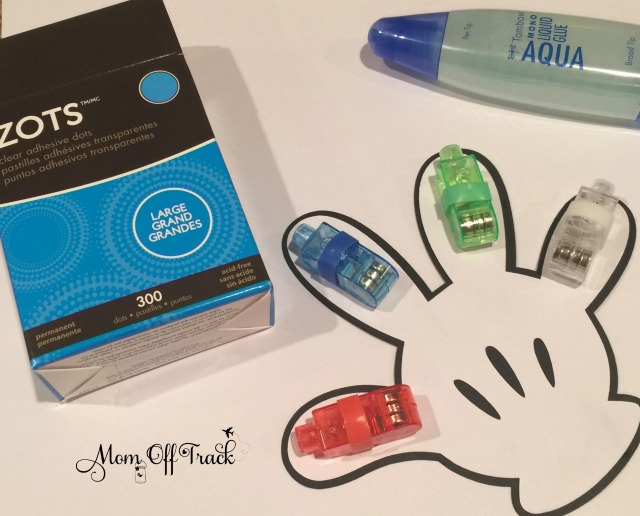
Following the directions on the Zots package attach one light (I did 1 blue, 1 red, 1 white, and 1 green) to each finger on the hand. Make sure you have the button on the light facing up-you want to attach the Zot to the flat side of the light.
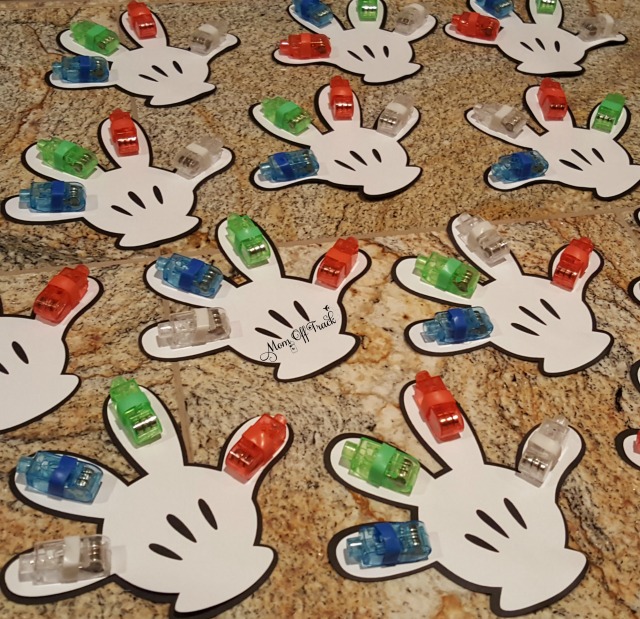
That’s it. Let dry and give out. I plan to put these Mickey Mouse hands with finger lights in cellophane bags in case any of the lights get bumped on the airline and make a cute bag topper with the Cricut but that is on next weeks agenda!